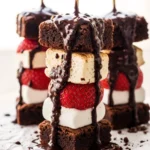
Imagine sinking your teeth through a crisp, snowy white shell into a dense, tangy heart of crimson velvet. The immediate hit of cocoa and cream cheese melts on your tongue, offering a luxurious texture that feels like a high-end truffle but takes half the effort. I know your schedule is a minefield of school runs, work calls, and endless errands. You want that ‘wow’ factor for your Galentine’s party without wrestling with a temperamental multi-layer cake or scrubbing flour off every surface. These bites are your secret weapon. Forget preheating the oven or worrying about sunken centers; this no-bake method delivers professional results while you’re catching up on your favorite podcast.
- Dietary: Vegetarian
- Time: 20 minutes (active), 2 hours (chilling)
- Difficulty: Easy
- Cost per serving: ~$0.45
Why This Recipe Works
The magic lies in the balance of fats and acids. By using softened, full-fat cream cheese as our primary binder, we create a structure that stays firm at room temperature yet feels velvety when bitten. Unlike traditional truffles that rely on heavy cream, the cream cheese provides a necessary tang that cuts through the sugar of the red velvet mix. We heat-treat the dry cake mix in the microwave to ensure safety while preserving that signature malted cocoa flavor. Using white almond bark instead of standard chocolate chips provides a more stable, glossy coating that snaps beautifully and resists melting on your fingers as you mingle with your friends.
Key Ingredients & Notes
- 15.25 ounce red velvet cake mix: This provides the base flavor and color. Chef’s Tip: Heat-treating the mix is non-negotiable to ensure the flour is safe for raw consumption.
- 8 ounce cream cheese (softened): Use the brick-style cream cheese for a stable texture. Chef’s Tip: Leave it on the counter for at least an hour to ensure it incorporates without lumps.
- 12 ounce white almond bark: This serves as our hardy, snowy coating. Chef’s Tip: Almond bark melts more smoothly than white chocolate chips and sets into a professional shell.
- ¾ cup red candy melts: These are for the festive finishing touch. Chef’s Tip: Do not add water to thin these out; if they are too thick, use a tiny drop of coconut oil instead.
The Process
Microwave the dry red velvet cake mix in a glass bowl. Use two 30-second intervals, stirring well between each, to ensure all the flour reaches a safe temperature. Let it cool completely before you move to the next step.
Beat the softened cream cheese in a large bowl until it looks like smooth silk. Now, slowly incorporate that cooled cake mix. The mixture will be thick and vibrant; don’t be afraid to get in there with a spatula to make sure no white streaks remain.
Chill the dough in the refrigerator for at least 2 hours. This is the hardest part, but cold dough is the only way to get those perfectly round shapes without a sticky mess.
Roll the chilled mixture into 1-tablespoon sized balls. They should be roughly the size of a large marble. Place them on a parchment-lined sheet as you go.
Melt the white almond bark according to the package directions. Dip each ball into the liquid bark using a toothpick or a fork, letting the excess drip off before returning it to the parchment. It will set quickly!
Drizzle the melted red candy melts over the top in a zig-zag pattern for that artisanal, bakery-window look. Let them set for 15 minutes before serving.
Expert Tips for Success

- Prevent Sticking: If the dough starts to stick to your palms while rolling, lightly dust your hands with a tiny bit of powdered sugar or pop the dough back in the freezer for five minutes.
- Smooth Coating: Tap the side of your bowl gently after dipping each ball. This vibration helps the excess almond bark flow off, preventing a ‘puddle’ at the base of your bites.
- Fixing Thick Bark: If your coating starts to thicken, do not add water. Re-heat it in 10-second bursts or stir in a teaspoon of vegetable shortening to restore the fluidity.
Variations & Substitutions
- Gluten-Free: Swap the standard cake mix for a gluten-free red velvet version; the texture remains identical.
- Dark Romance: Use dark chocolate almond bark instead of white for a richer, more intense flavor profile.
- Vegan Option: Use a vegan-certified cake mix and a plant-based cream cheese brick.
FAQ
Yes! Raw flour can carry bacteria. Spending 60 seconds in the microwave makes these bites completely safe to enjoy without baking.
These bites are best kept in an airtight container in the fridge. They stay delicious for up to 5 days, making them the perfect make-ahead treat for a busy week.
Absolutely. Freeze them on a tray first, then transfer to a freezer bag. They’ll last for 3 months. Just thaw them in the fridge overnight before your party.