We’ve all been there: you take a bite of a homemade Rice Krispie treat and it’s so hard it nearly breaks a tooth. You wanted a nostalgic, gooey hug, but you got a sugary brick. As a busy mom, you need a win that doesn’t involve scrubbing a burnt pot or hearing your kids complain that the treats are “too crunchy.”
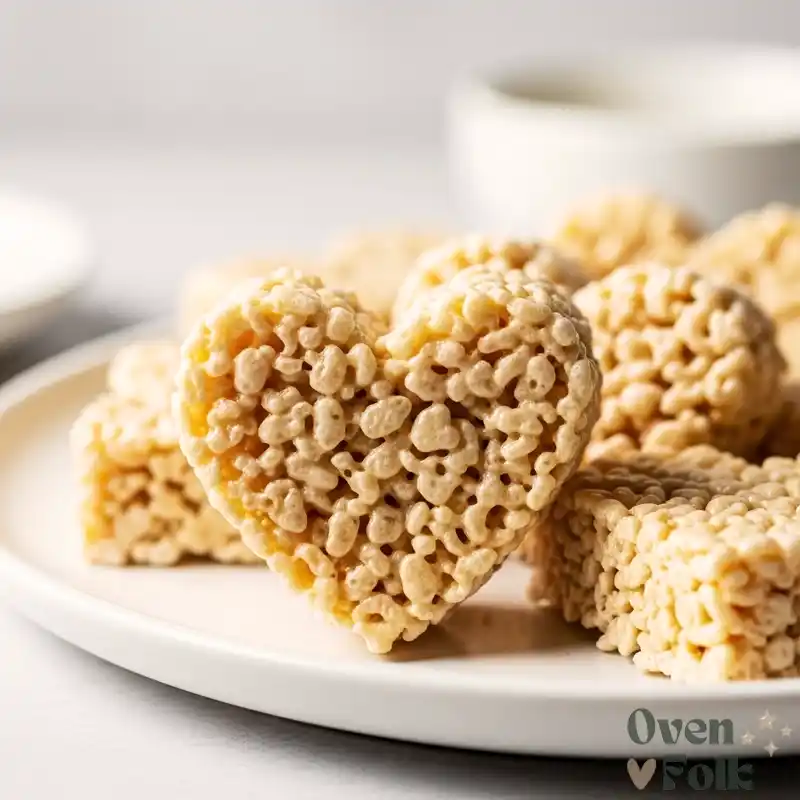
These Heart-Shaped Rice Krispie Treats are the ultimate Valentine’s Day shortcut, but with a major upgrade. I use what I call the “Soft-Pull Method” to ensure these stay bakery-soft for days. They look like a million bucks on a platter, but they take 20 minutes and zero oven time. Let’s reclaim your kitchen and make a treat that actually stays gooey.
At-A-Glance
- Dietary: Nut-Free, Gluten-Free (check your cereal brand)
- Time: 20 Minutes
- Difficulty: Very Easy
- Cost per serving: $0.25
Why This Recipe Works (The “Soft-Pull” Method)
Most people follow the recipe on the back of the box, which is a mistake. The box recipe doesn’t use enough butter and often results in dry treats. My “Soft-Pull Method” changes everything with two specific rules.
First, the “Marshmallow Reserve.” We don’t melt all the marshmallows at once. We save two cups to fold in at the very end. These don’t fully melt; they turn into little pockets of molten marshmallow “glue” that keep the cereal from becoming brittle.
Second, the “Low-Heat Lockdown.” High heat is the enemy of sugar. If you rush the melting process, the marshmallows crystallize and turn hard as they cool. By melting on the lowest possible heat, we keep the sugar soft and pliable. It takes three minutes longer, but it saves the entire batch from the trash can.
Key Ingredients & Notes
- 6 cups (160g) Crisp Rice Cereal: Use a name brand for the best crunch. Chef’s Tip: If your cereal is even slightly old, toast it in a dry pan for 2 minutes to bring the “snap” back.
- 12 oz (340g) Mini Marshmallows: Note the extra 2 ounces! Most bags are 10oz, so buy two. We need the extra for that signature pull.
- 4 tbsp (56g) Salted Butter: We use salted butter to cut through the sugar. Chef’s Tip: Using European-style butter (like Kerrygold) adds a rich, toffee-like flavor.
- 1/2 tsp Vanilla Extract & a pinch of Sea Salt: This is what separates “box” treats from “bakery” treats.
Equipment Needed
- Large Non-Stick Pot (The bigger, the better for easy stirring)
- Heart-Shaped Cookie Cutter Set
- 9×13 inch baking pan
- Parchment paper
Step-by-Step Instructions
Step 1: Prep for Success. Line your 9×13 pan with parchment paper. Leave a little overhang so you can lift the entire block out later for easy cutting.
Step 2: The Low-Heat Melt. In your large pot, melt the butter on LOW heat. Once melted, add 10 ounces of the marshmallows. Keep stirring until they are 90% melted—you should still see a few small lumps. Remove from the heat immediately.
Step 3: The “Soft-Pull” Fold. Stir in the vanilla and sea salt. Now, add the cereal AND the reserved 2 ounces of whole marshmallows. Fold gently until every piece of cereal is glistening. Those extra marshmallows will soften but stay intact, creating “gooey pockets.”
Step 4: The Gentle Press. Transfer the mixture to the pan. CRUCIAL: Do not pack it down. Use a piece of buttered parchment paper to lightly press the mixture until it’s level. If you press too hard, you’ll lose the air pockets and the treats will be tough.
Step 5: Stamp the Hearts. Let the pan sit for 10-15 minutes (just until slightly firm but still warm). Use your heart cookie cutter to stamp out your shapes. Lift the parchment paper out and enjoy the scraps! These look incredible next to my Strawberry Cake Mix Cookies.
Expert Tips
- Wet Your Hands: If the mixture is sticking to your fingers, lightly dampen your hands with water or a little butter. The marshmallows won’t stick to wet skin.
- Clean Cuts: To get the sharpest heart shapes, spray the inside of your cookie cutter with a tiny bit of non-stick spray before every third or fourth cut.
Variations / Substitutions
Vegan Version: Swap the butter for a plant-based stick and use vegan-certified marshmallows. Color Pop: Add a drop of pink gel food coloring to the melted marshmallows before adding the cereal for a vibrant Valentine’s Day look.
FAQ
Can I make these in the microwave?
You can, but I don’t recommend it. The microwave creates “hot spots” that can overcook the sugar in the marshmallows, leading to hard treats. The stovetop “low and slow” method is the only way to guarantee a soft pull.
How do I store these?
Store in an airtight container at room temperature. They will stay soft for up to 4 days. Whatever you do, DO NOT put them in the fridge—the cold air will turn the marshmallows into stones.
My treats are falling apart. Why?
This usually happens if you didn’t press them down enough or if you didn’t use enough marshmallow. Make sure you use the full 12oz of marshmallows to ensure everything stays bonded!

Heart-Shaped Rice Krispie Treats
Equipment
- Large pot
- 9×13 Pan
Ingredients
- 6 cups Rice Cereal
- 10 oz Mini Marshmallows
- 3 tbsp Unsalted Butter
Instructions
- Melt butter in a large pot over low heat.
- Add marshmallows and stir until smooth.
- Remove from heat and fold in cereal.
- Press into a lined 9×13 pan and cut into hearts once cooled.
Notes